Introduction to Git
We just created our first repository and updated our file. But how exactly did we do that and what were we even doing exactly? This is where git comes in!
What is Git?
Git is a third-generation version control system designed to keep track of changes in your projects. Created in 2005 by Linus Torvalds, the creator of the Linux kernel, Git is a decentralized version control system that requires changes to be saved (committed) before they can be combined (merged) with the main project. What that means in lay terms is that Git is the software that allows you to track changes in your project and collaborate with others. You are already familiar with this concept if you’ve ever used Google Docs or Microsoft Word’s “Track Changes” feature, but in those you get the version history automatically. With git, we have to tell it what to track and when to track it.
A very important thing to understand is that while git and GitHub sound the same, they are two separate technologies. Git is a version control system, while GitHub is a platform for hosting git repositories. We’ll be using both in this course, but it’s important to realize they are not identical.
A Brief History of Version Control (Optional read)
Before Git, there were several generations of version control systems that evolved to meet the changing demands of software development. The first generation, represented by tools like Source Code Control System (SCCS) developed in 1972 by Marc Rochkind at Bell Labs, was centralized and relied on simple single-file locking-based concurrency. The Revision Control System (RCS), developed a decade later in 1982, followed the same lines but became widely popular due to its open-source nature.
The second generation included the Concurrent Versions System (CVS), which allowed for more networked, collaborative work by introducing a merging-based approach instead of a file-locking approach. However, CVS had limitations that were addressed by its successor, Subversion, released in 2000, which allowed for more robust fileset operations with atomic commits.
Git represents the third generation of version control, combining lessons from these previous systems with new features suited for modern, large-scale software development.
Why is Git Useful in Humanities?
Although Git and version control systems are predominantly used in software development, they offer several advantages for scholars in the digital humanities. Similar to how you might handle versions of a paper, essay, or data set, Git allows you to:
- Keep track of changes in plain text files
- Collaborate in real-time with other researchers
- Easily revert to earlier versions
- Create different branches to explore new ideas without disturbing the main project
Working with Git and GitHub
In this course, we will be using GitHub extensively, which requires some understanding of git and version control. However, you are not required to install git or use it in your terminal (though both things may prove easier down the road). Instead, we will be using GitHub’s web interface to work with git.
Installing Git (Optional step)
If you decide to install Git on your local computer, I highly recommend following these instructions here and also reaching out to the instructor if you have issues. For Windows users, you will also need to install Git for Windows, which includes Git Bash. Step-by-step instructions can be also found here.
Editing Files in GitHub
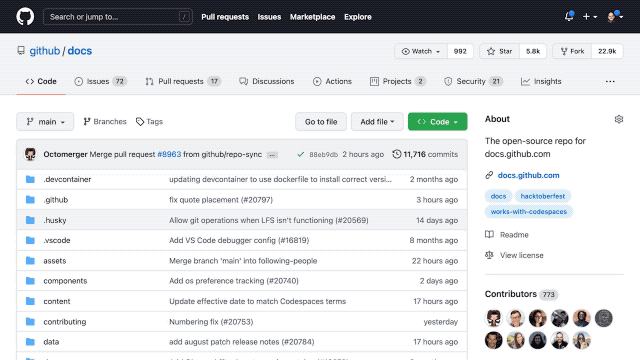
So far, we have already tried to edit a file in GitHub. This is a great way to make quick changes to a file, but it’s limiting to working with one file at a time. For more complex projects, we will need to use either the command line with git or GitHub in the broswer.
Let’s try adding using the GitHub interface in the browser and making more changes to our README.md file.
GitHub Dev
GitHub Dev is a new feature that allows you to edit files in the browser and commit them to your repository. To access it, all you have to do is change github.com in your URL to github.dev.
So for us, we would change https://github.com/[USER NAME]/is578-introduction-dh to https://github.dev/[USER NAME]/is578-introduction-dh.
You can also just hit the . key on your keyboard when you’re in a repository to open GitHub Dev.
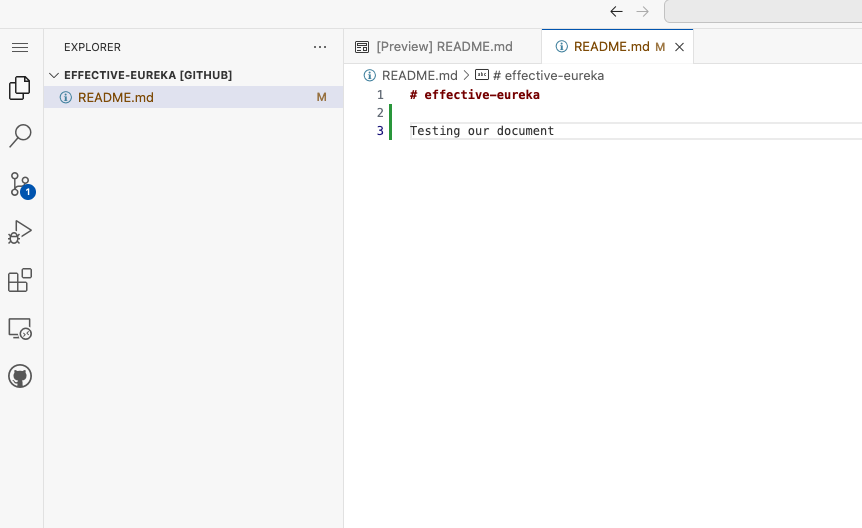
Now you should see a new interface that looks like this:

This interface let’s us interact with our repository and files in a program called Visual Studio Code (VS Code). VS Code is a text editor that is very popular with programmers and digital humanists. It is also owned by Microsoft, which gives you a taste of how much they are centralizing the (DH) tools ecosystem.
Now we can update our README.md file with some new text. Let’s add a new section called “In Class Lab Activity” and add some text to it.
You’ll notice after you click on the file and update it, that there’s a small blue circle with a number in it. This is the number of changes you’ve made to the file. If you click on it, you’ll see a new Side Panel with the name SOURCE CONTROL. This interface is where we need to save our changes.
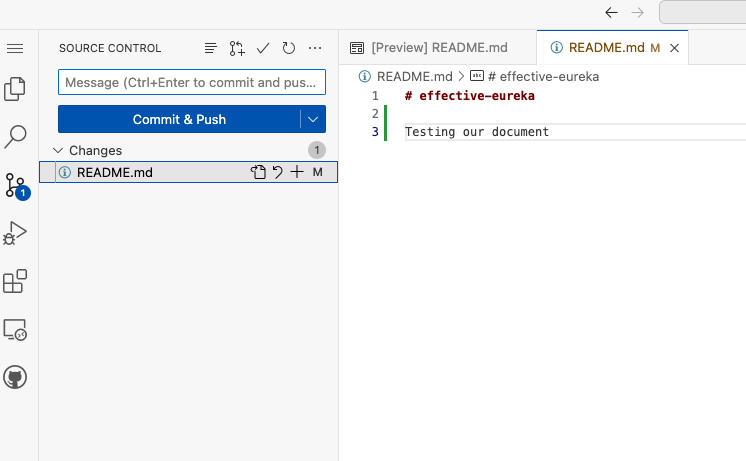
First, we need to once again write a message for our commit in the white box that says Message (if you don’t you’ll see an angry red message). Once we have done that we can press the big blue button that says Commit & Push.
Initially it will seem like nothing happened, but if we navigate back to our github.com version of our repository, you’ll see that the updated changes are live.
Git Branching and Merging
So far we have been working with git, but not really talking about it. Every time we commit a change that is git.
But what is a commit exactly?
A commit is a snapshot of your project at a particular point in time. It’s like a save point in a video game. You can go back to it at any time and see what your project looked like at that point in time.
But what if you want to try something new? You don’t want to mess up your project, but you want to try something new. This is where branching comes in.
A branch is a copy of your project that you can make changes to without affecting the main project. You can create as many branches as you want and then merge them back into the main project when you’re ready.
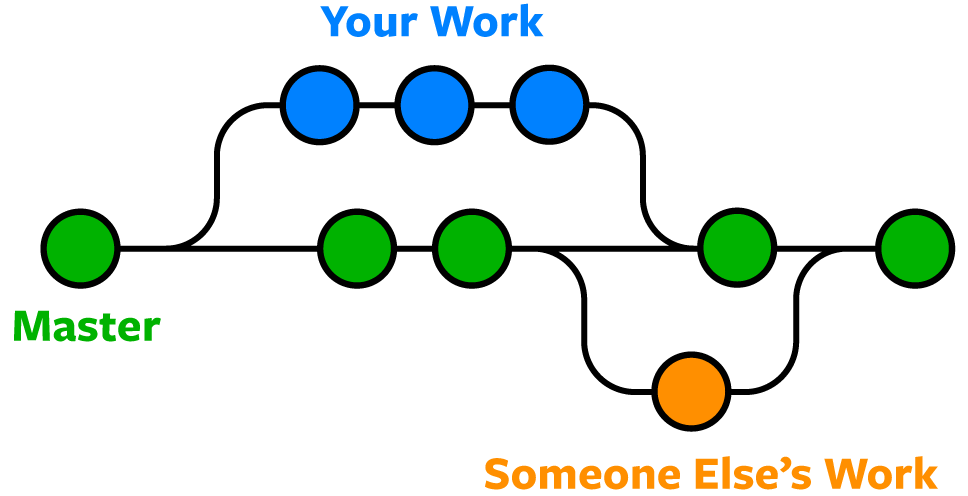
While we won’t use much branching in this course, it’s important to know it exists. For example, in our repository we have been committing to the main branch. But we could create new branches if we wanted to try something new.
Git Commands and AI Tools
While we will use git more extensively towards the end of the semester, I want to flag that so far we haven’t really explained how to use git beyond pressing buttons on GitHub. This is only scratching the surface, but can also be overwhelming when starting off.
Eventually diagrams like the one below will make sense:
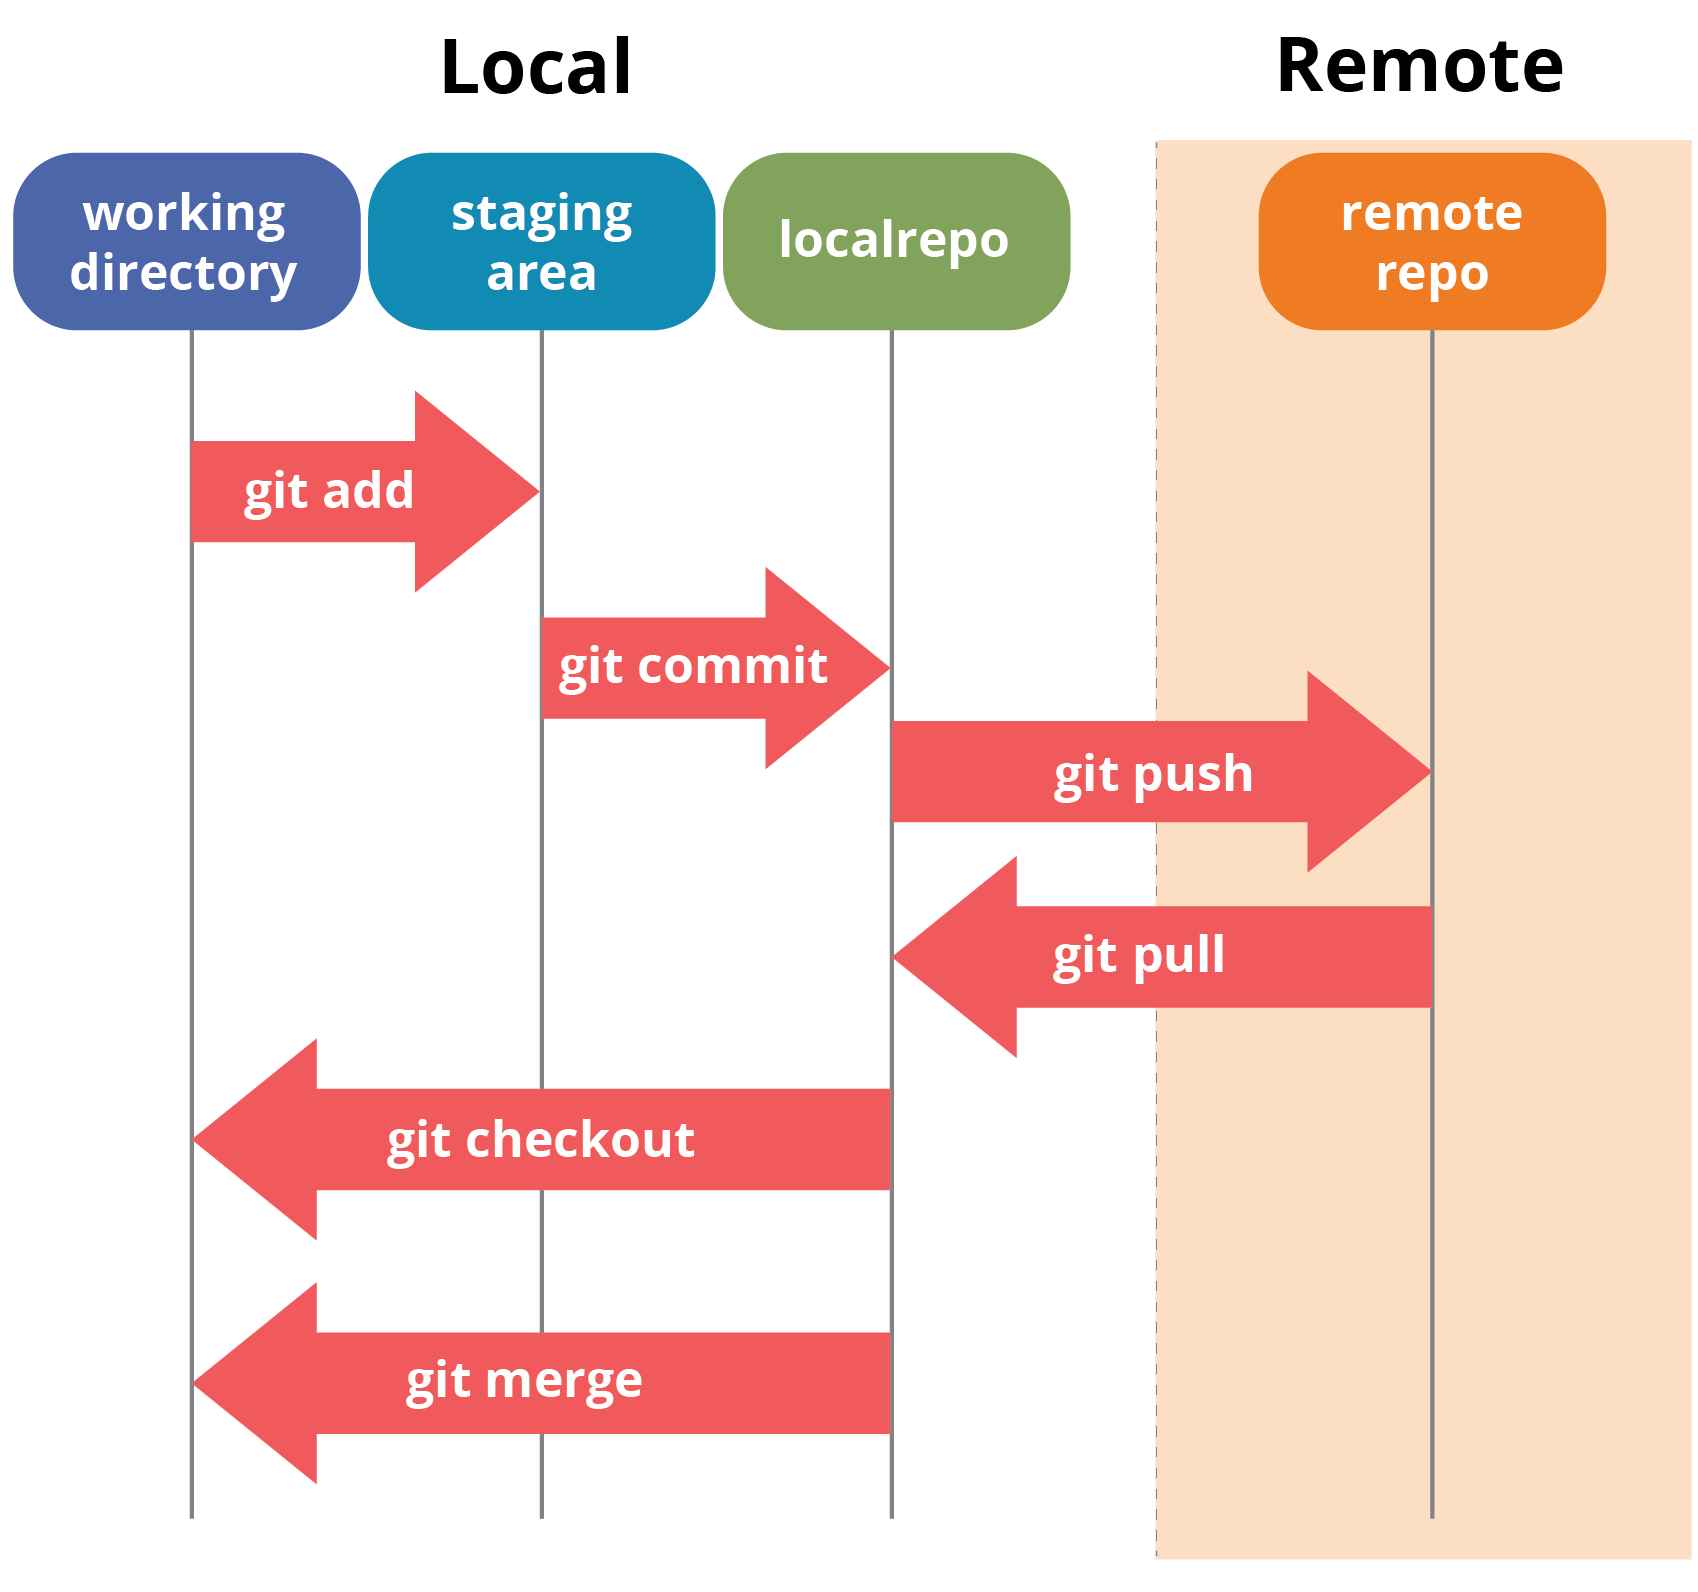
But for now, I would suggest that if you have any errors when using GitHub and git that you both reach out to the instructor, explore the resources below, and also try to using your preferred AI tool for fixing errors. The results may not be perfect, but this type of technical syntax is difficult to learn so it’s important both to practice and utilize the resources available to you.
In Class Lab Activity
Updating Repositories
So far, we have only updated our README.md file, but we can also add other files in our repository. Let’s try adding our command line maze to our repository.
Any suggestions or questions for how we could do this?
Assignment
- Find one DH tool using whatever digital workflow you prefer. This tool may be one that you’ve used before, read about, or just found through searching.
- Once you’ve located your tool, try to find it in the Index of DH conferences interface https://dh-abstracts.library.virginia.edu/ and “download” at least one of the abstracts (how you do this will depend on your workflow and preference). If you cannot find your tool, then either try to find an alternative tool OR find an example of its usage in a DH project.
- Create a new file in your GitHub repository using the
github.devinterface and the new file button. Save this file asDH-Tool.md(remember the.mdto indicate the file type) and add the following information:- Name of the tool
- Link to the tool
- Link to the abstract or DH project
- A short description of why you consider this to be a “DH tool” and whether you have previous experience using it.
- Commit and save the file to your repository. Then, finally, share a link to your file in our GitHub discussion forum for the assignment here.
Additional Resources
- Shane Lin’s Git for Humanists, a great introduction to Git for humanists
- Melanie Walsh’s Introduction to Git and Github in Introduction to Cultural Analytics https://melaniewalsh.github.io/Intro-Cultural-Analytics/04-Data-Collection/04-Git-GitHub.html